|
||

Tutorial: Using csUnit For Simple Testing
csUnitRunner is a standalone application, which comes as part of csUnit version 1.2 or later. It can any kind of binaries as long as it is in the .NET PE format. This is the case for all applications which you can create with Visual Studio .NET. In this tutorial I will show you how easy it is to create tests and to run them from csUnitRunner. It takes only four steps!
Prerequisites
For this tutorial I assume that you have downloaded and installed csUnit version 1.2 or later. Furthermore, I assume that you have installed Microsoft Visual Studio .NET.
Step 1: Creating the project
In Visual Studio .NET in the menu select "File - New - Project..." The "New Project" dialog box appears. We will use tutorial3 as the name for our project. Fill in the dialog box according to the following picture:
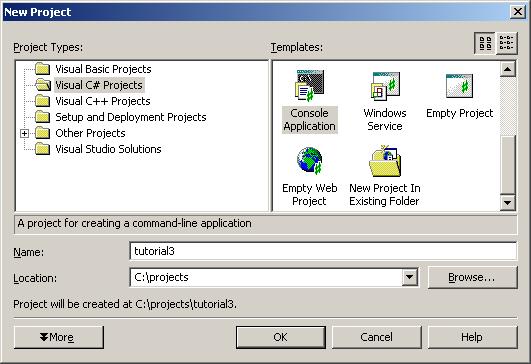
The location of the project might be different on your machine. Also, in this tutorial we will use a console application as an example. You can, however, also use a windows application, a class library, or a windows control library as project. All of them will do.
Click OK in order to create the project.
Step 2: Add a test class
Next, we will add a class, which hosts your tests. In the menu select "Project - Add Class...". The following dialogbox appears:
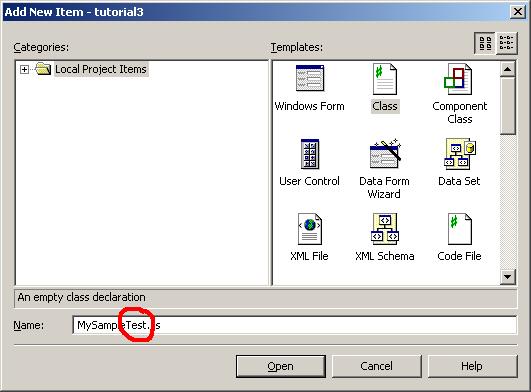
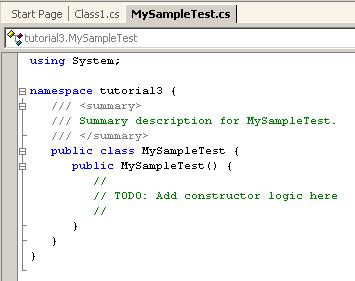
It is important that the name of the class ends with "Test", as csUnitRunner will use the name to identify class that contain tests. Click "Open". Make sure that the class you created is public so that it is visible from outside the binary. After some pretty printing the resulting source code should look like this:
Step 3: Add a simple test
Next, we need to add a test to the class. For csUnitRunner to find the test it is important that the test method name begins with "test" (lower case t!), and further more the signature of the method must be "public void <methodName> ()". Furthermore, it should not be declared static. The result looks like this:
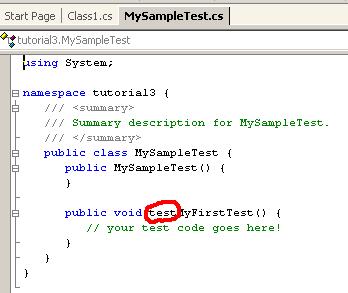
Build the debug version of the binary using "Build - Build Solution".
Step 4: Run the tests
Start csUnitTestrunner by selecting clicking the Windows "Start"-button and selecting "Programs - csunit - csUnitRunner". In csUnitRunner click the "Load Assembly..."-button and navigate/select the binary to load (tutorial3.exe):
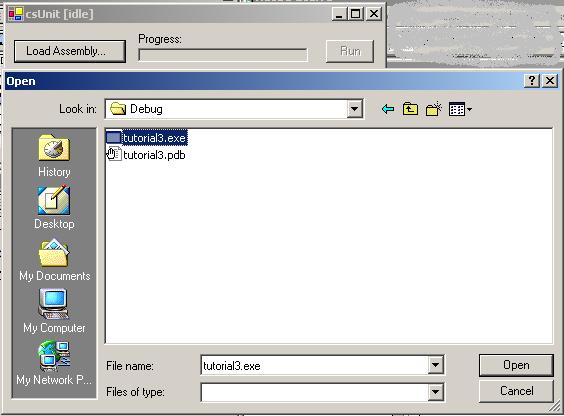
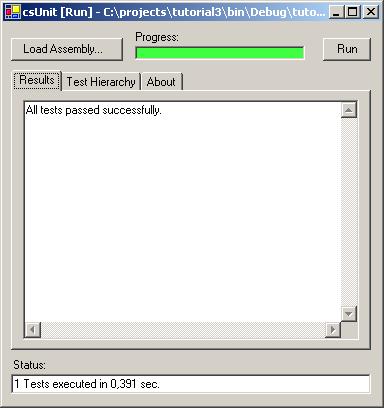
Click "Open". Next, click "Run". After that the "Results" tab looks like this:
Next, click the "Test Hierarchy" tab. Click the "Expand All" button:
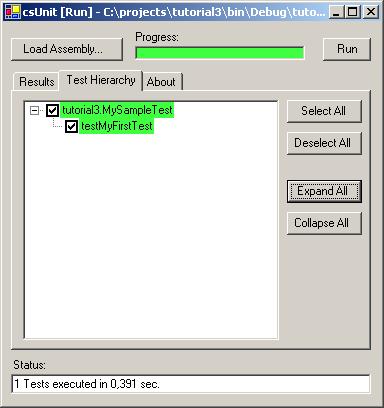
As you can see, it displays the test hierarchy of your application.
Summary
As you have seen, it takes only four simple steps to get started.
Happy testing!
Sponsors:
![]()
![]()
![]()
Sources hosted by
Copyright © 2002-2008 by Agile Utilities NZ Ltd. All rights reserved. Site design by Andreas Weiss. This site is protected by bot traps.