|
||

Tutorial 2: csunit with .NET library
Note: This tutorial applies only to csunit before version 1.2! It does not apply to version 1.2 or later.
As a .NET library has no entry point, we need to have an entry point as well. In this tutorial I assume that you already have created the .NET library project, e.g. a class library or a windows control library. For more information about how to create these projects, please refer to your Visual Studio .NET documentation.
For this tutorial I will use a class lib named SampleLib with Class1 being the only class in the project. Class1 has this exciting code:
using System;
namespace SampleLib {
/// <summary>
/// Summary description for Class1.
/// </summary>
public class Class1 {
public Class1() {
//
// TODO: Add constructor logic here
//
}
}
}
Now we can start by integrating csunit for testing Class1.
- Start Visual Studio .NET and open/create your library project.
- In the solution explorer on the solution explorer tab, make a right mouse click. - OR - In the File menu select "Add Project" - "New Project..."
- In the "Add New Project" dialog box, select "Windows Application" as the project type and type in a name for your project. I recommend to use the name of the class lib and simply append "Test" to the name. In our case this would be "SampleLibTest" for "SampleLib":

- In the newly created project SampleLibTest locate the entry point of the application (the default is form1.cs):
/// <summary>
/// The main entry point for the application.
/// </summary>
[STAThread]
static void Main() {
Application.Run(new Form1());
}Replace this code with the following:
/// <summary>
/// The main entry point for the application.
/// </summary>
[STAThread]
static void Main() {
csunit.csunit.Main();
}
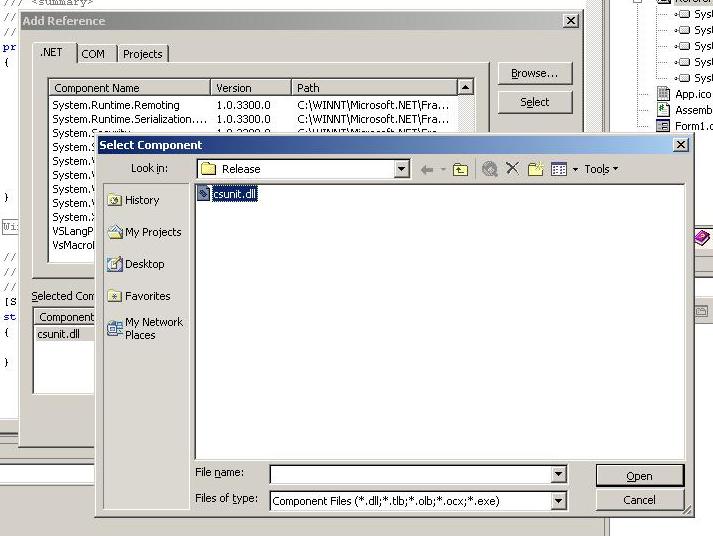
- When you try to compile now, you will receive an error "The type or namespace 'csunit' could not be found (are you missing a using directive or an assembly reference?)". The latter is true; we need to add the reference for the csunit library to the SampleLibTest application. You do this by right-clicking the SampleLibTest projects node in the Solution Explorer, and then selecting "Add Reference...". In the "Add Reference" dialog box click browse and locate the assembly csunit.dll:
Click "Open" and then "OK". csunit now appears in the references node of the SampleLibTest application. - Compile and (try to) run the application. You will see an error message, if your library is still set to be the Startup Project. Make SampleLibTest the StartUp project. You do this by right-clicking the SampleLibTest project and then selecting "Set as StartUp Project".
- Run the application. You will see the following screen:
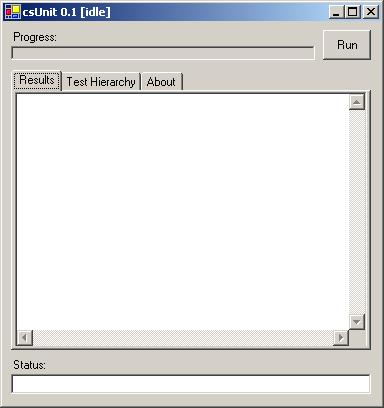
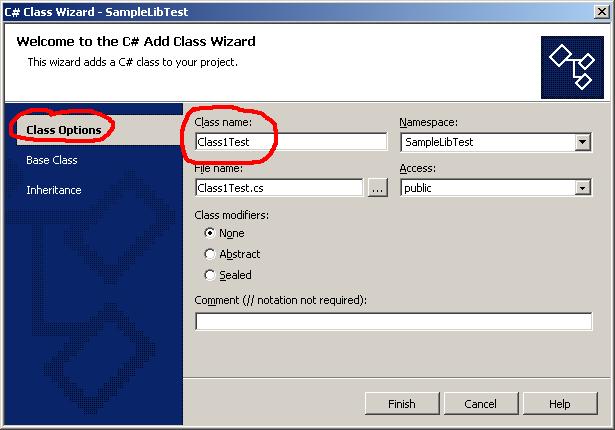
As we do not have any tests yet, nothing exciting will happen once you click "Run". We will add a simple test now. - In the class view of the solution explorer do a right-click on the SimpleLibTest project and select "Add - Add class...". In the "C# Class Wizard" dialog box on the "Class Options" tab, enter "Class1Test" as class name (Do not close the dialog box!!):
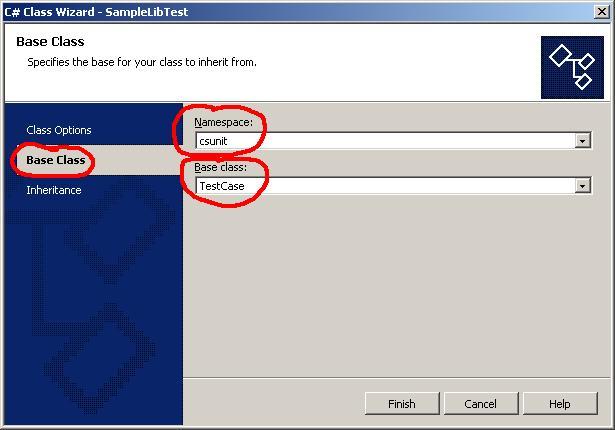
Do not close the dialog box! Now select the "Base Class" tab and select 'csunit' as the namespace and 'TestCase' as the base class:
Now click "Finish" to close the dialog box. The class wizard generates some initial code of your test class. - In the test class in order to add our test add the lines printed in italics here:
using System;
using csunit;
using SampleLib;
namespace SampleLibTest {
/// <summary>
///
/// </summary>
public class Class1Test : csunit.TestCase {
public Class1Test() {
//
// TODO: Add constructor logic here
//
}
public void testClass1() {
Class1 obj = new Class1();
Assert.assertTrue(obj.foo());
}
}
}
- Trying to compile will again cause an error "The type or namespace 'csunit' could not be found (are you missing a using directive or an assembly reference?)". In this case we tried using symbols from the SampleLib assembly without referencing it in the SampleLibTest project. We fix this problem by right-clicking the SampleLibTest node in the solution explorer and then selecting "Add Reference...". This time we switch to the "Projects" tab. You will see the SampleLib project listed there. Select it, click "Select" and then "OK" to close the dialog box. A reference to 'SampleLib' is added to the references of SimpleLibTest.
- Compilation will bring up another error: "'SampleLib.Class1' does not contain a definition for 'foo'". We fix this by implementing 'foo' (see code in italics):
using System;
namespace SampleLib {
/// <summary>
/// Summary description for Class1.
/// </summary>
public class Class1 {
public Class1() {
//
// TODO: Add constructor logic here
//
}
public bool foo() {
return true;
}
}
}
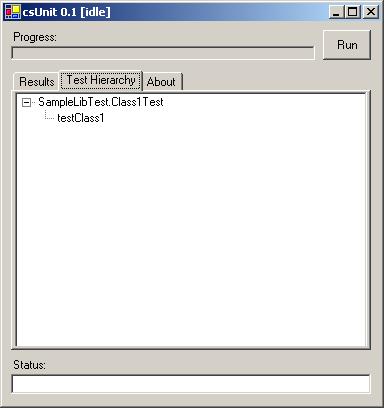
- Now the solution should compile correctly. Run the csunit project and switch to the "Test Hierarchy" tab:
- Finally, click "Run" in the csunit dialog box. The result should look like this:

- In order to add more tests, repeat steps 9 through 13. If you want to add another test class, start at step 8.
Sponsors:
![]()
![]()
![]()
Sources hosted by
Copyright © 2002-2008 by Agile Utilities NZ Ltd. All rights reserved. Site design by Andreas Weiss. This site is protected by bot traps.