|
||

Tutorial 1: csunit with .NET application
Note: This tutorial applies only to csunit before version 1.2! It does not apply to version 1.2 or later.
As there must not be two entry points for a single .NET application, we have to use csunit as an additional referenced library. And here is how you can do it:
- Open Visual Studio .NET and open/create your solution/project. It does not matter whether you have initially created a Windows application or a console application.
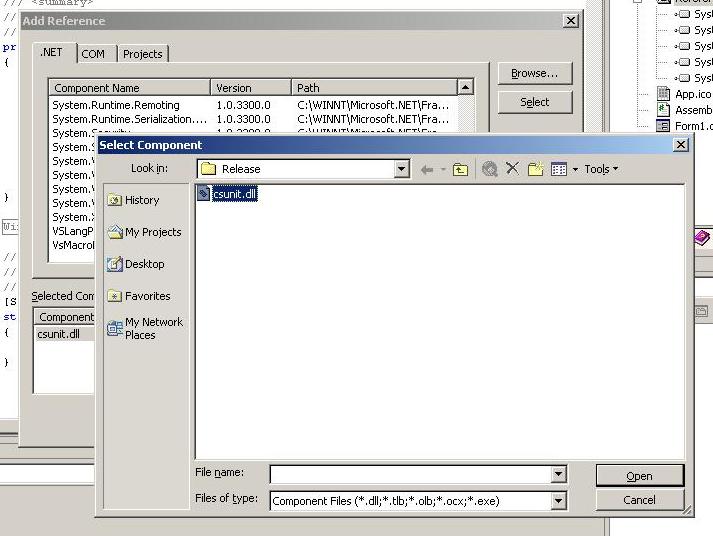
- In the "Solution Explorer" add a reference to csunit.dll. If necessary you have to browse for it in the "Add Reference" dialog box:
- In your source code locate the lines which start the application. The should look similar to this:
[STAThread]
static void Main() {
Application.Run(new Form1());
}
Replace the lines with:
[STAThread]
static void Main() {
csunit.csunit.Main();
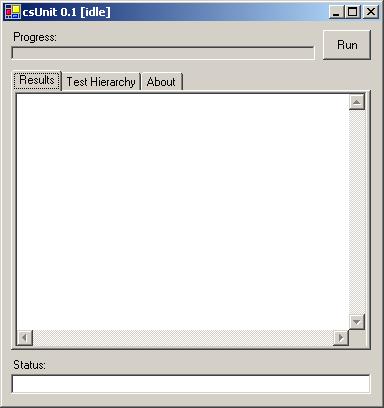
} - Press F5 to run csunit. You should see the following form:
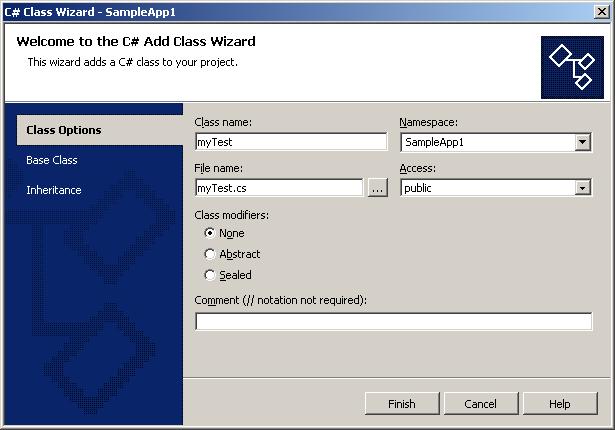
- You are now ready to add your first testcases. You do this by right-clicking the application node of you application in the class view of Visual Studio .NET. Then select "Add..", then "Add class...". In class options enter the name for your test class. In this walkthrough we use "myTest" as the name:
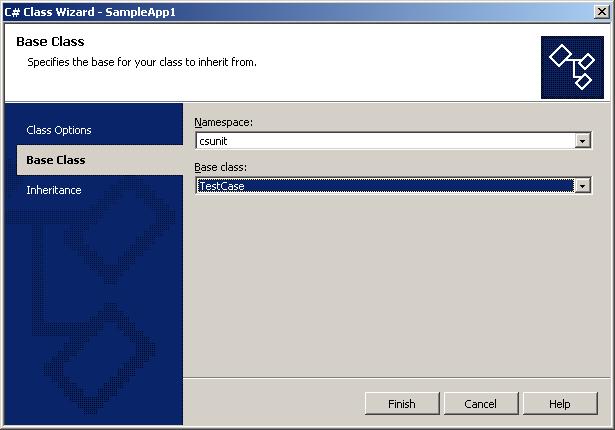
- Click the "Base Class" tab on the left side. Select "csunit" (not csunit.Web!!) as the namespace and "TestCase" as the base class for your test class:
- Finally click "Finish" to close the dialog. The wizard automatically creates a new test case class.
- Next we will add a simple test to the test class. To allow csunit to find your tests, make sure that the name of the method containing the test starts with "test" (all letters lowercase). And here is another important hint: Do not write any try-catch-blocks in your tests; exceptions are handled by the framework, which displays information about the exception, which was thrown and where it was thrown.
The source code looks like this:
using System;
namespace SampleApp1 {
/// <summary>
///
/// </summary>
public class myTest : csunit.TestCase {
public myTest() {
//
// TODO: Add constructor logic here
//
}
public void testSample1() {
csunit.Assert.assertTrue(true);
}
}
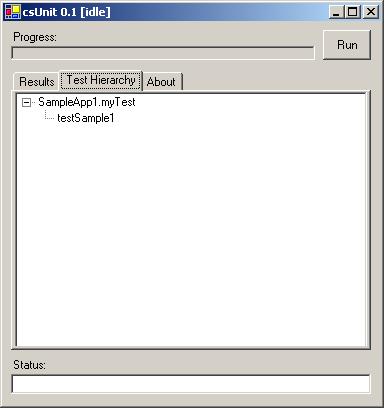
} - Now, press F5 again to start your program. When you see the csunit form, click the tab "Test Hierarchy". You should see the "tree" of your testcases:
- Next, we also add a test that we know will fail:
using System;
 namespace SampleApp1 {

                  /// <summary>

                  ///

                  /// </summary>

                  public class myTest : csunit.TestCase {

                  public myTest() {

                  //

                  // TODO: Add constructor logic here

                  //

                  }

                  public void testSample1() {

                  csunit.Assert.assertTrue(true);

                  }


                  public void testFail() {

                  csunit.Assert.assertTrue(false);

                  }

                  }

                  }
- Finally, we run all the tests. Press F5 and click the "Run" button. We expect that one of the tests will fail, and we expect also that one of the tests will succeed. But let's see. Here is are the screenshot from my display:
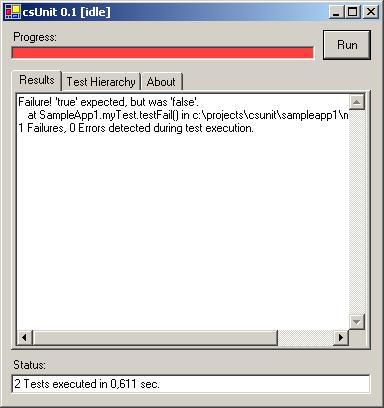
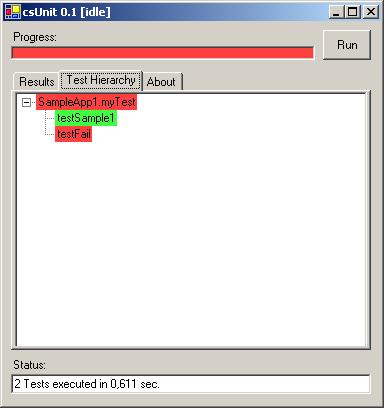
This is the end of this tutorial. If you have found it useful, if you think it needs improvement, if you think it contains a defect, or if you have a question, please contact me.
Sponsors:
![]()
![]()
![]()
Sources hosted by
Copyright © 2002-2008 by Agile Utilities NZ Ltd. All rights reserved. Site design by Andreas Weiss. This site is protected by bot traps.